


Add your Project folder on Github and follow the below-mentioned steps.
Steps Before Deploying
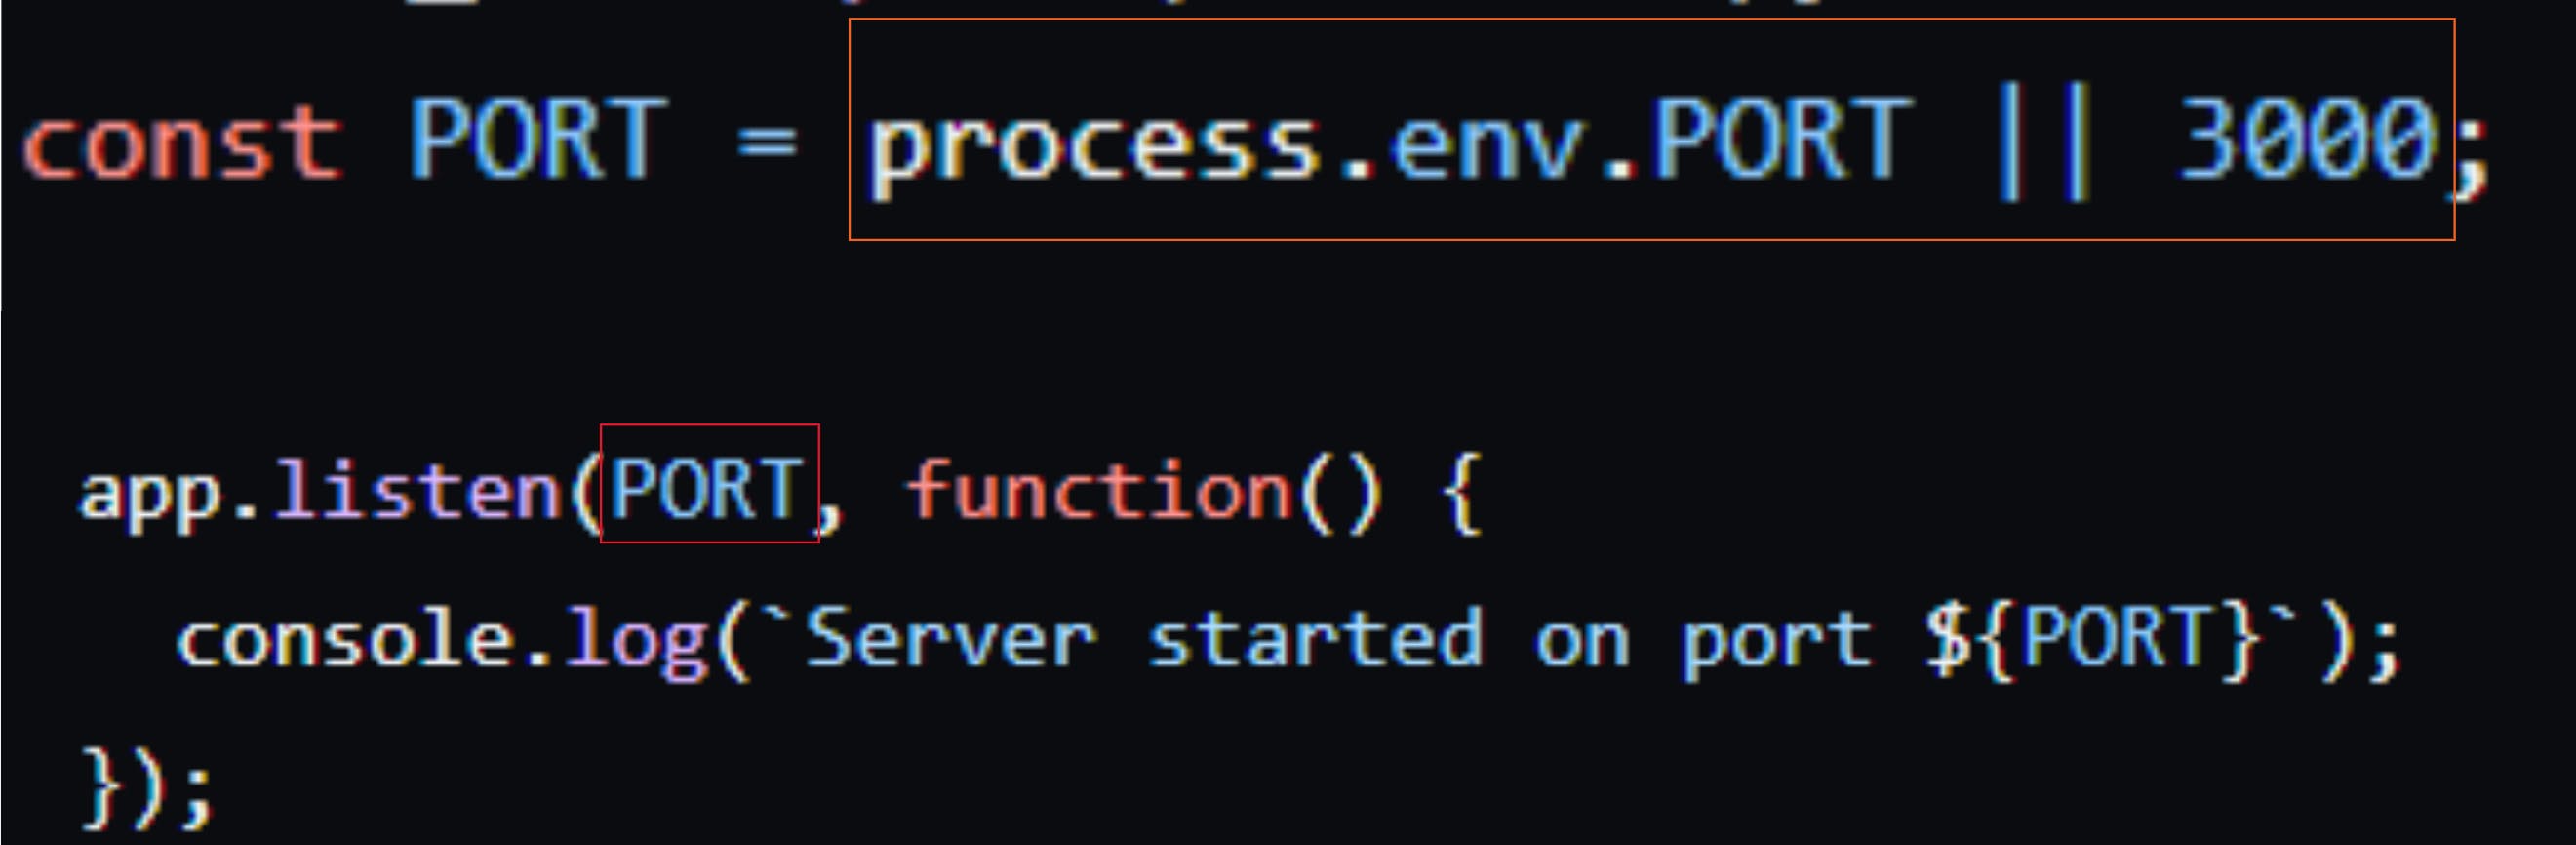
Change your PORT 3000 (or else) to prev.env.PORT in your main file(in my case it's app.js). As the port is itself decided by the hosting server so by defining the above variable, the port will itself be defined.
Let's Deploy
Create an Account on Render.
Click on GET STARTED at the top right corner.

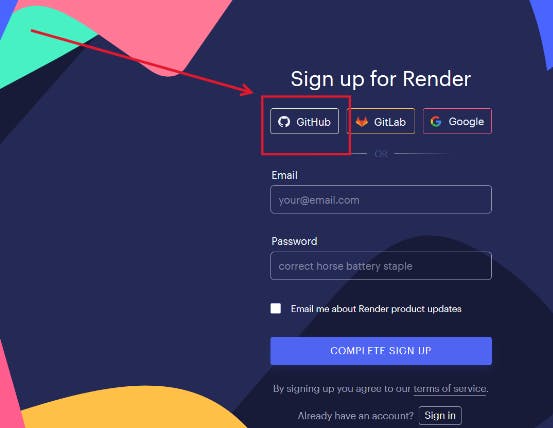
Sign Up using GitHub.
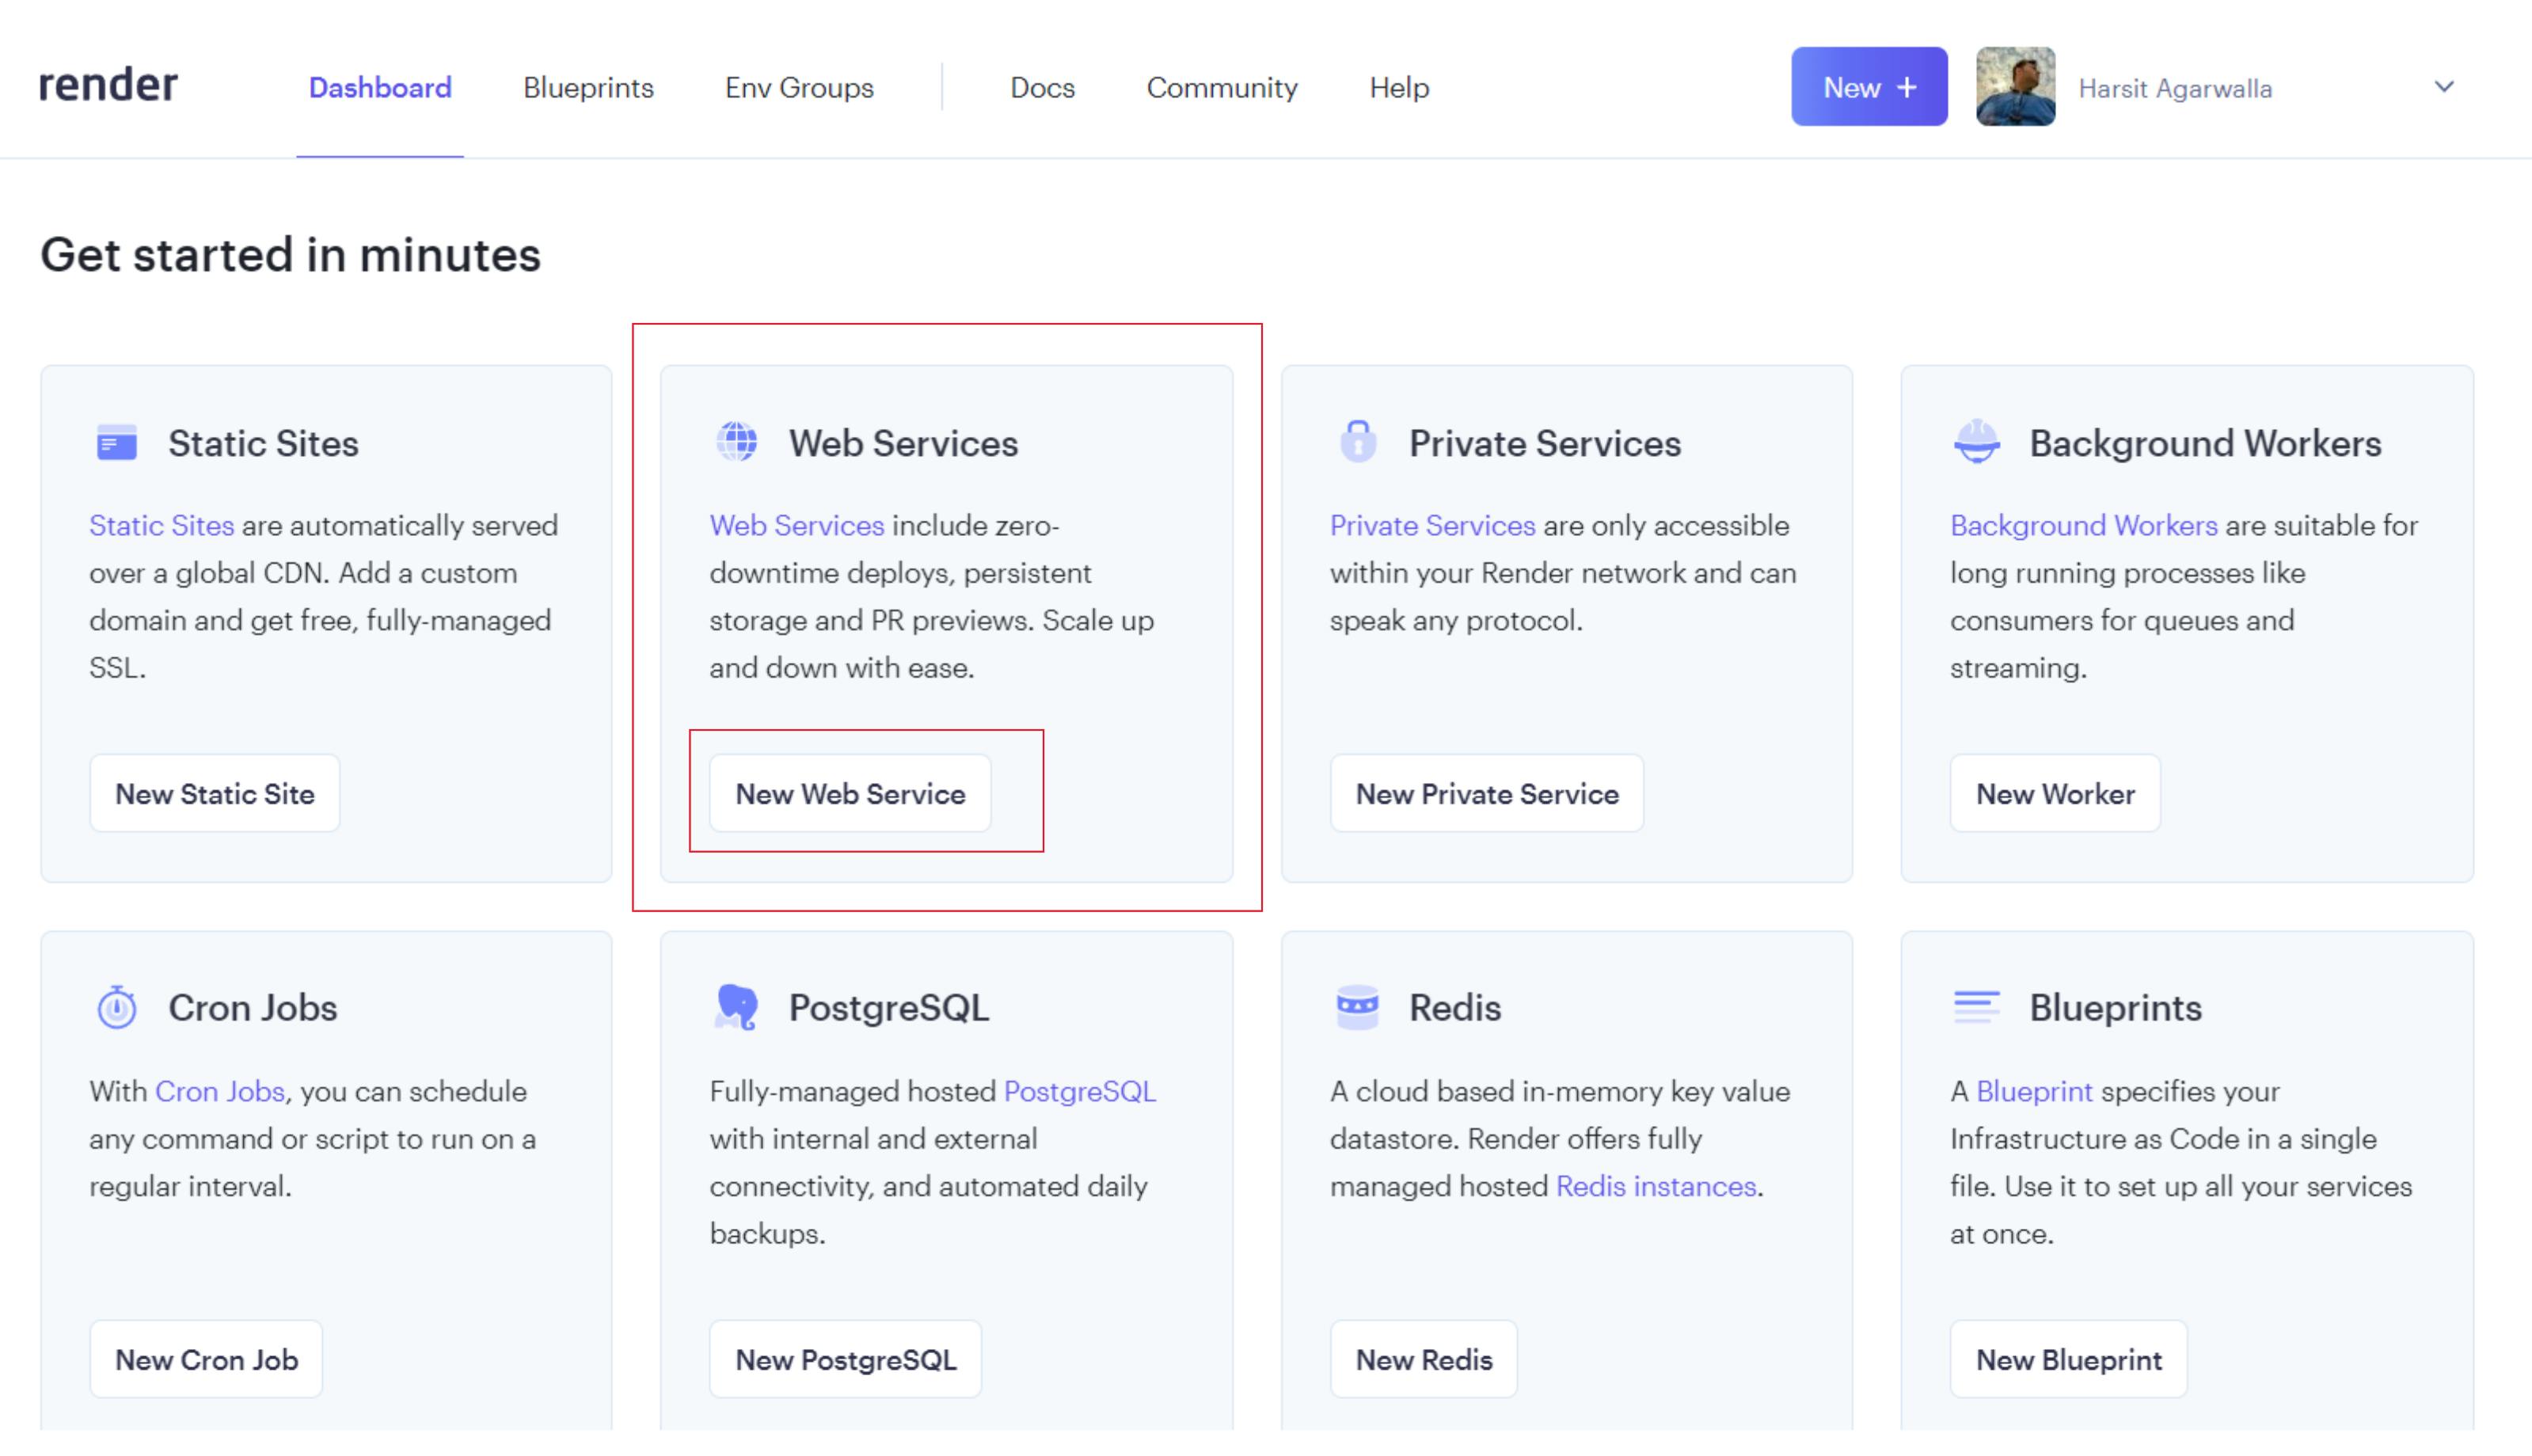
After Signing Up you will see the web page shown in the next step.
Click on the New Web Service button under Web Services.
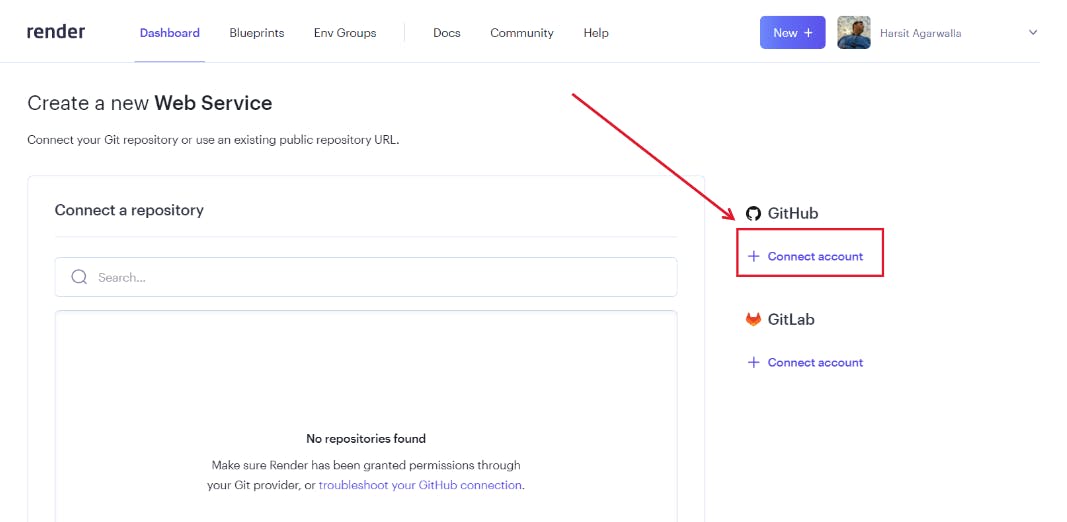
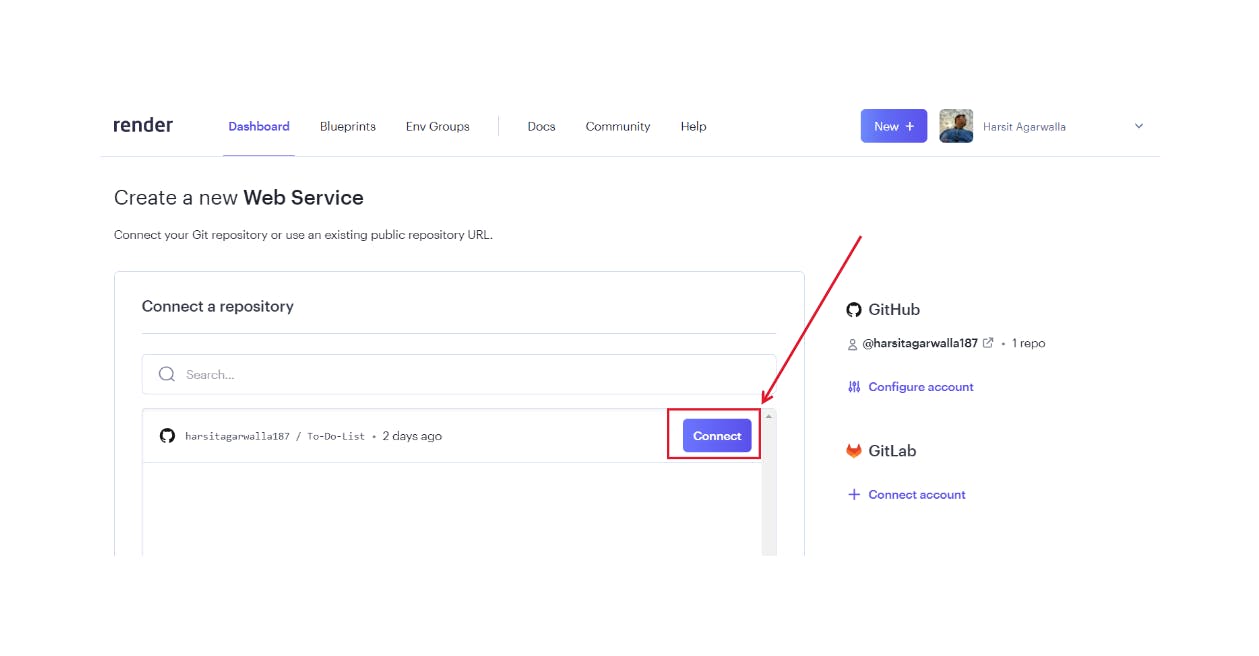
Click on Connect account which is under Github.
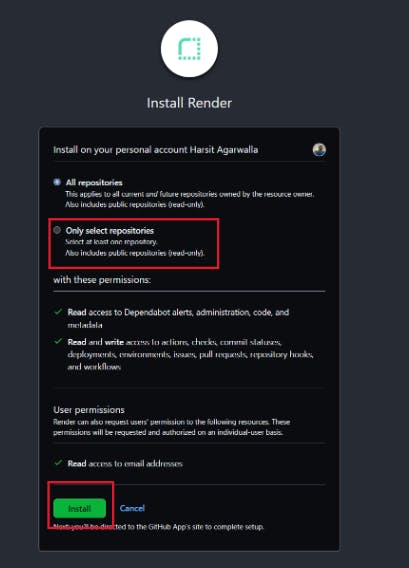
Click on Only Select Repositories.
Select the Repositories that are to be Deployed.
Click on Install.
Now the page will look as shown below.
Click on Connect.
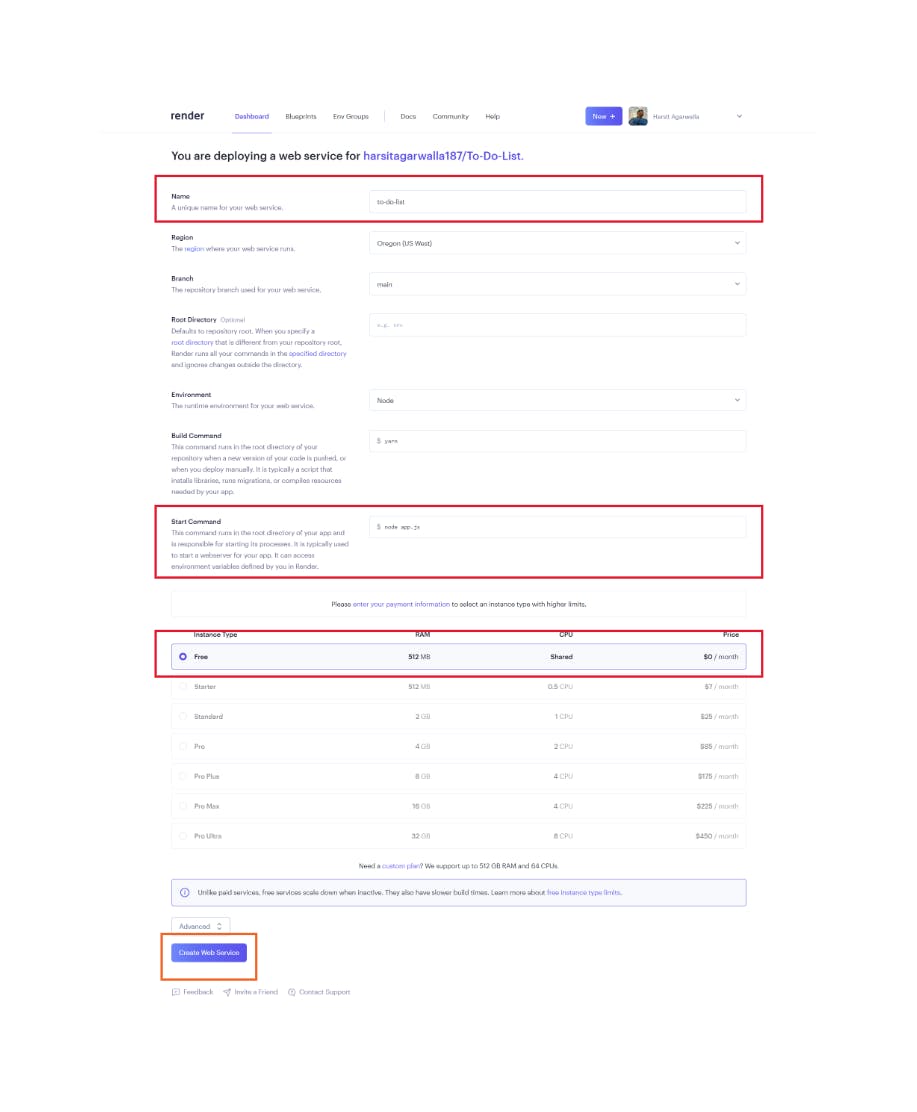
In the name section: Write the name that you want to see in your link
In Start Command: write node app.js(if the name of your main file is app.js or else write the name of your filename).
Select Free in Instance type otherwise you have to pay for deploying it.
Click on Create Web Services.
Hurrah! We have deployed our application.
It will be live in some minutes.
If it takes too much time then try to refresh it.